
 For those of you who may not know the background, my basement has always been a rental suite ever since my husband and I moved in here 11.5 years ago. Our most recent tenants were my parents and they moved out in December into my grandparents' house. My grandparents' moved into an apartment. We decided that the space would better serve us as my "Ultimate Scrap Room" than a rental unit and the renovations began.
The above photo is what you see as soon as you walk into my room. To the left you can see some of my old cameras that I have collected over the years. The second one from the top was my mom's first camera. I have a guest book out for my visitors to sign in when they come to visit and it is sitting on top of my grandma's old sewing machine. That was the machine I used to make my daughter's first Halloween costume with my grandma's help.
 As soon as you come in the door and turn to the right, that is my photo archival area. Since I opened DAT'S Scrapbooking 6.5 years ago, most of my photos are in those totes or are still on cds because I haven't had time to get them into albums. In time, the photos will make it to the albums. For now, we have a great space to store them and to sit down and go through all the albums that are done. This used to be my parents' dining room.
 When you walk a little bit forward, to the left you will find what used to be my parents' kitchen. This was newly renovated in 2008, due to our basement flooding. My Cuttlebug, Cricut Machine and Sewing Machine now sit out, ready to be used at a moments notice and the rest of this area is great storage and extra scrapbooking space for my daughter or my girlfriends. I even have a small bar fridge where my parents' dishwasher used to be.
 We turned my parents' "lazy susan" in the corner cupboard into my Cricut Cartridge storage area.
 One of the deep drawers in the kitchen area fits ten of the WAL-MART bead boxes that I use to store my Stamping Bella Bling, brads & other small embellishments.
 This narrow cupboard used to hold my parents' baking sheets and now it holds 10 small clear storage containers that I bought from Canadian Tire.
 Another angle shot of the kitchen area. My sewing machine is set up where my parents' stove used to be.
 One more angle shot of the kitchen area.
 This is a general storage cupboard that fit in perfectly where my parents' fridge used to be.
 My parents' old pantry and microwave area works out to be the perfect stamp storage area for me. The green magazine holders each hold 9 of the Stampendous Thin Stamp Storage containers that is perfect for all my EZ Mounted Rubber Stamps. The next area presently holds 19 Close to My Heart Storage containers and there is still room for 8 more. The bottom area used to be 3 pull out drawers, but we had the carpenter make us another one and it holds all my Stampin' Up Stamp Storage containers perfectly.
 Here is my parents' old livingroom. It is now my main scrapbooking area. The walls are painted '57 Chevy Blue because that is Trevor's favourite colour. The Green Apple accent colour is my favourite colour. It just so happens that our two favourite colours are the popular colours for all decor stuff right now.
 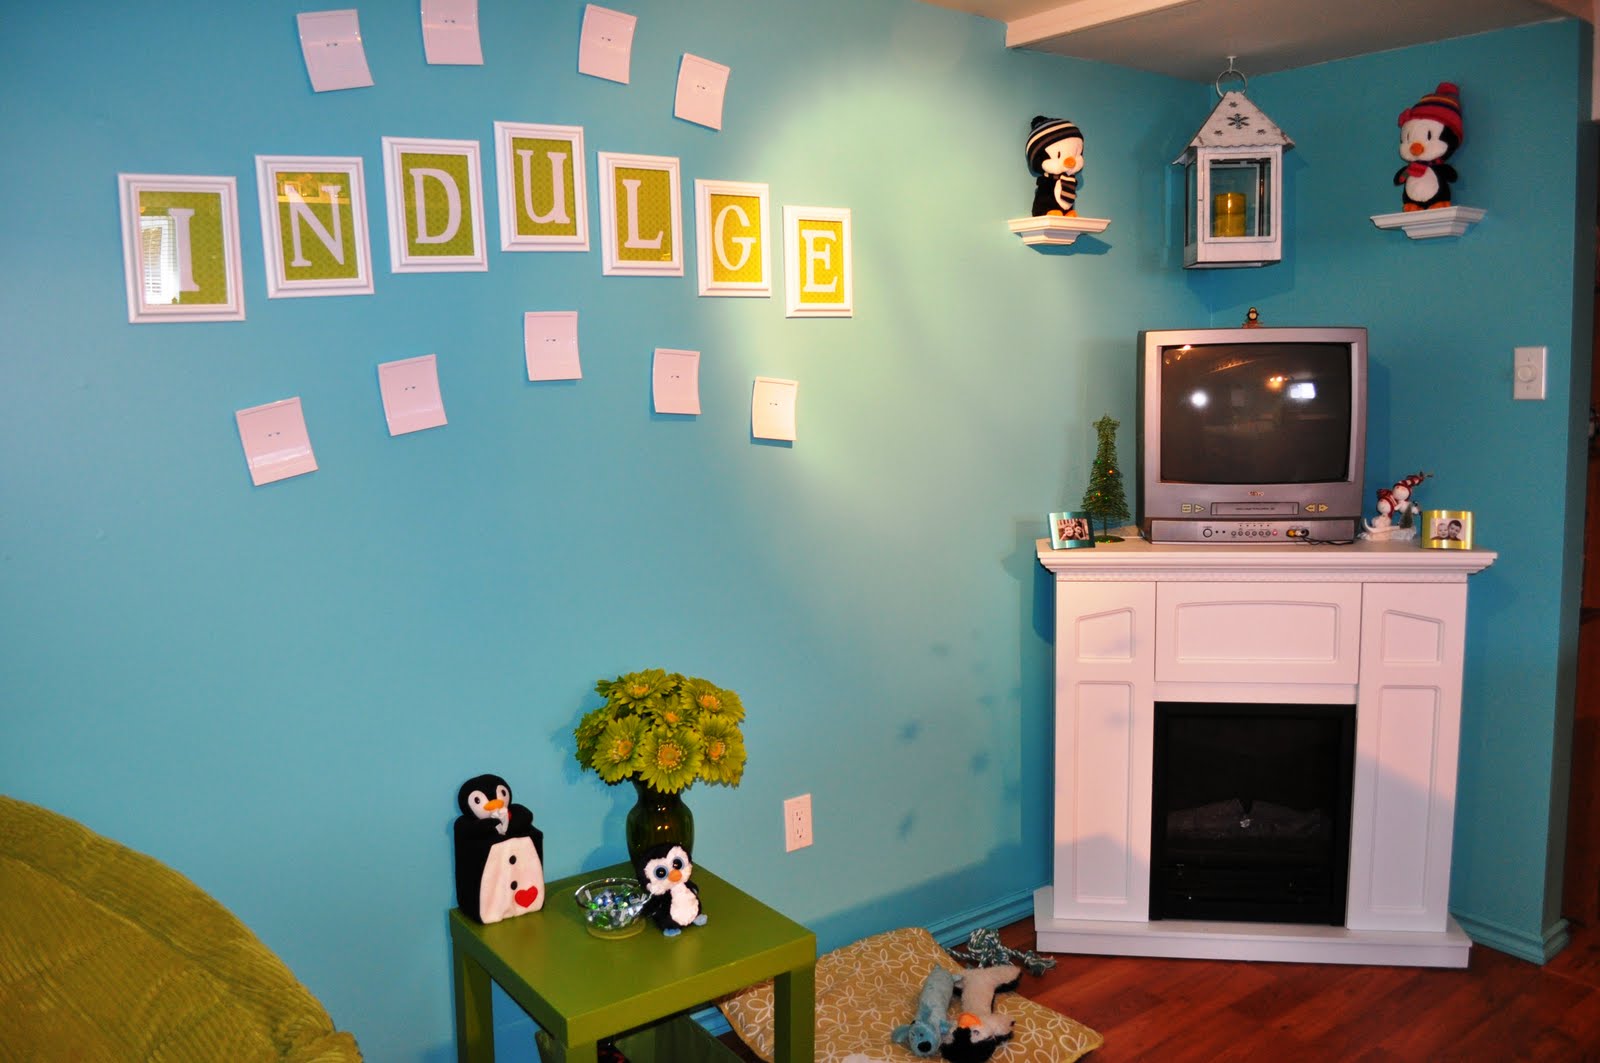 This is to the right of the room when you first walk in. My scrap room is in the basement and it does get chilly down here in the winter, but this fireplace is amazing and throws great heat to keep me warm. You can also see that there is a pillow on the floor with some toys on it. That is Sparkle's dog bed. She has one in every room of the house.
 My electric fireplace not only keeps me warm, but it stores my tv, dvd player and my music.
  On the opposite end of my fireplace wall, I have a comfy chair to kick back in and relax. It also is a great place for my daughter to relax in and watch a movie while I scrapbook.
 This is a medicine cabinet that I bought at WAL-MART for $40.00. As you can see I still have more space for the new Stampin' Up inks coming out in the summer. It also is sunken in on the top so that the 18 jars that I have can't slide off the top shelf.
 Behind the door with all the punches on it was my parents' bedroom, but it is now our exercise room. Across from the wall of punches is the entrance to Amy's hang out room.
 This is my just under 12 foot counter top area and storage area.
 There is my island with more storage underneath it. That door with all the punches on it is the bathroom door.
 Same space, different angle shot.
 Again, same space but a different angle shot to show you all the storage I have under my island.
Well, hopefully I have given you an idea of how you can store some of your own scrapbooking supplies. I love my space. Dreams definitely do come true. I have pictured this space in my head for over 6 years and I finally have it. So, don't ever give up on your dreams.
Happy Scrappy Day!


